Installing MariaDB as MySQL replacement
We will install MariaDB instead of MySQL. MariaDB is a MySQL fork maintained by the original MySQL developer Monty Widenius. MariaDB is compatible with MySQL and provides interesting new features and speed improvements when compared to MySQL. Run the following command to install MariaDB-server and client:
apt-get -y install mariadb-server mariadb-client
Now we set a root password for MariaDB.
mysql_secure_installation
You will be asked these questions:
Enter current password for root (enter for none): <-- press enter
Set root password? [Y/n] <-- y
New password: <-- Enter the new MariaDB root password here
Re-enter new password: <-- Repeat the password
Remove anonymous users? [Y/n] <-- y
Disallow root login remotely? [Y/n] <-- y
Reload privilege tables now? [Y/n] <-- y
Test the login to MariaDB with the "mysql command"Set root password? [Y/n] <-- y
New password: <-- Enter the new MariaDB root password here
Re-enter new password: <-- Repeat the password
Remove anonymous users? [Y/n] <-- y
Disallow root login remotely? [Y/n] <-- y
Reload privilege tables now? [Y/n] <-- y
mysql -u root -p
and enter the MariaDB root password that you've set above. The result should be similar to the screenshot below: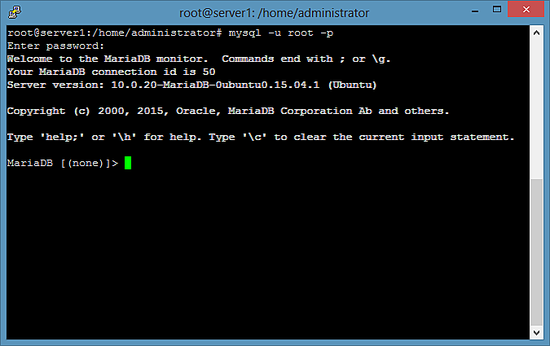
To leave the MariaDB shell, enter the command "quit" and press enter.
Install Apache 2.4
Apache 2 is available as an Ubuntu package, therefore we can install it like this:
apt-get -y install apache2
Now direct your browser to http://192.168.1.100, and you should see the Apache2 default page (It works!):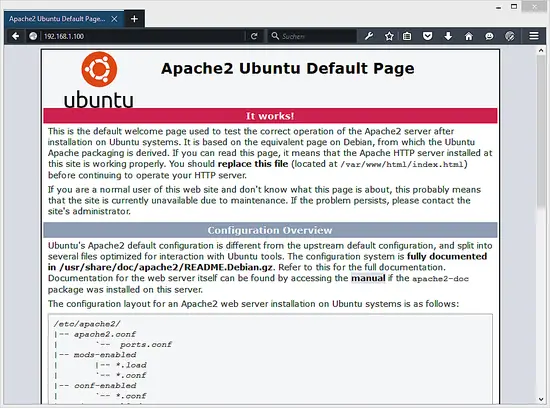
The document root of the apache default vhost is /var/www/html on Ubuntu and the main configuration file is /etc/apache2/apache2.conf. The configuration system is fully documented in /usr/share/doc/apache2/README.Debian.gz.
Install PHP 5.6
We can install PHP 5.6 and the Apache PHP module as follows:
apt-get -y install php5 libapache2-mod-php5
Then restart Apache:
systemctl restart apache2
Test PHP and get details about your PHP installation
The document root of the default web site is /var/www/html. We will now create a small PHP file (info.php) in that directory and call it in a browser. The file will display lots of useful details about our PHP installation, such as the installed PHP version.
nano /var/www/html/info.php
<?php
phpinfo();
?>
Then change the owner of the info.php file to the www-data user and group.
chown www-data:www-data /var/www/html/info.php
Now we call that file in a browser (e.g. http://192.168.1.100/info.php):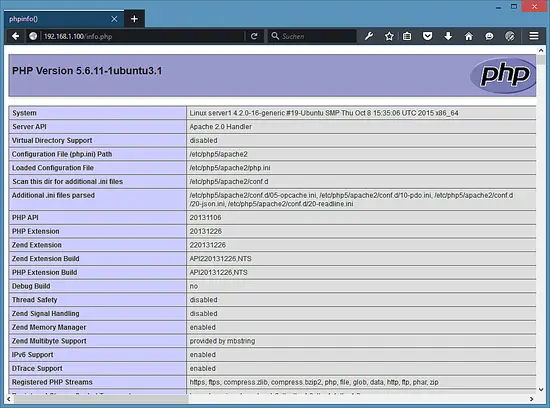
As you see, PHP5 is working, and it's working through the Apache 2.0 Handler, as shown in the Server API line. If you scroll further down, you will see all modules that are already enabled in PHP5. MySQL is not listed there which means we don't have MySQL / MariaDB support in PHP yet.
Get MySQL / MariaDB support in PHP
To get MySQL support in PHP, we can install the php5-mysqlnd package. I will install the new MySQL driver package php5-mysqlnd here instead of the old php5-mysql package as the old drivers show error messages about a MySQL library version mismatch when used with MariaDB. It's a good idea to install some other PHP5 modules as well as you might need them for your applications. You can search for available PHP5 modules like this:
apt-cache search php5
Pick the ones you need and install them like this:
apt-get -y install php5-mysqlnd php5-curl php5-gd
php5-intl php-pear php5-imagick php5-imap php5-mcrypt php5-memcache
php5-ming php5-ps php5-pspell php5-recode php5-snmp php5-sqlite
php5-tidy php5-xmlrpc php5-xsl
Now restart Apache2:
systemctl restart apache2
Install the APCu PHP cache to speed up PHP
APCu is a free PHP opcode cacher for caching and optimizing PHP intermediate code. It is strongly recommended to have one of these installed to speed up your PHP page.APCu can be installed as follows:
apt-get install php5-apcu
Now restart Apache:
systemctl restart apache2
Now reload http://192.168.1.100/info.php in your browser and scroll down to the modules section again. You should now find lots of new modules there: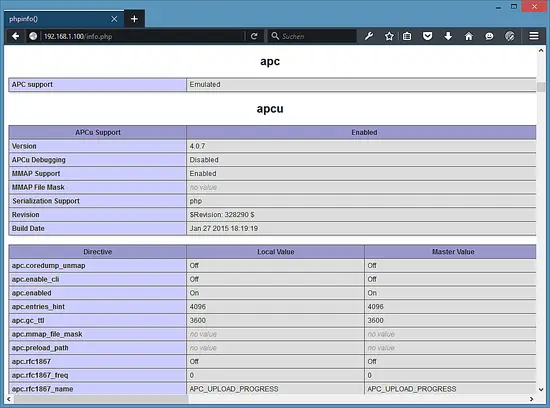
Please don't forget to delete the info.php file when you don't need it anymore as it provides sensitive details of your server. Run the following command to delete the file.
rm -f /var/www/html/info.php
Enable the SSL website in apache
SSL/ TLS is a security layer to encrypt the connection between the web browser and your server. Execute the follwoing commands on your server to enable https:// support. Run:
a2enmod ssl
a2ensite default-ssl
which enables the ssl module and adds a symlink in the
/etc/apache2/sites-enabled folder to the
file /etc/apache2/sites-available/default-ssl.conf to include it into
the active apache configuration. Then restart apache to enable the new
configuration:a2ensite default-ssl
systemctl restart apache2
Now test the SSL connection by opening https://192.168.1.100 in a web browser.
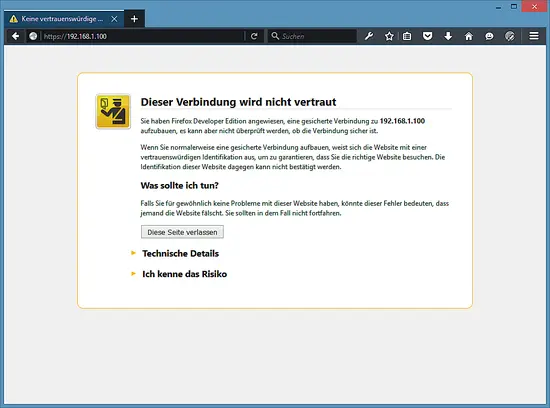
You will receive a SSL warning as the ssl certificate of the server is a "self signed" ssl certificate, this means that the browser does not trust this certificate by default and you have to accept the security warning first. After accepting the warning, you will see the apache default page.
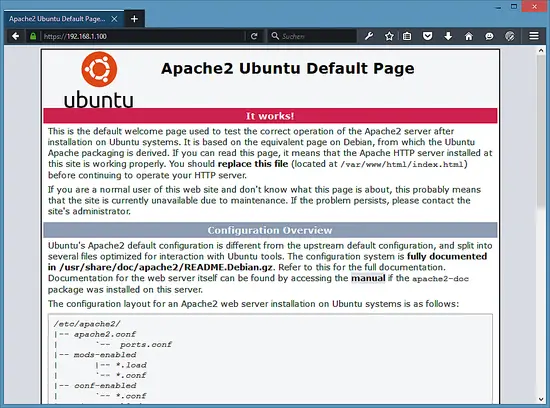
The closed "Green Lock" in front of the URL in the browser shows that the connection is encrypted. To get rid of the SSL warning, replace the self signed SSL certificate /etc/ssl/certs/ssl-cert-snakeoil.pem with a officially signed SSL certificate from a SSL Authority.
Install phpMyAdmin
phpMyAdmin is a web interface through which you can manage your MySQL databases. It's a good idea to install it:
apt-get -y install phpmyadmin
You will see the following questions:
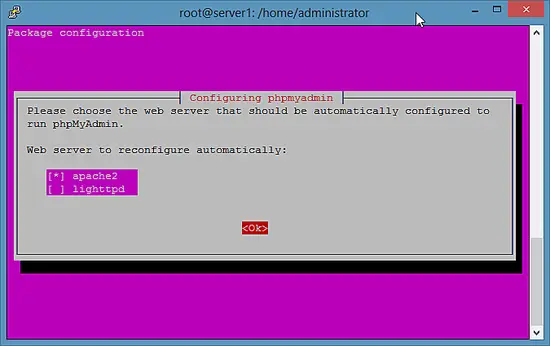
Web server to configure automatically: <-- Select the option: apache2
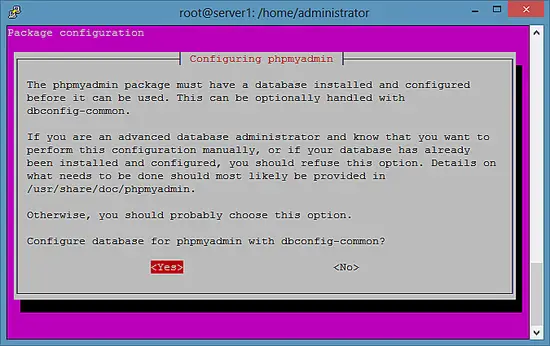
Configure database for phpmyadmin with dbconfig-common? <-- Yes
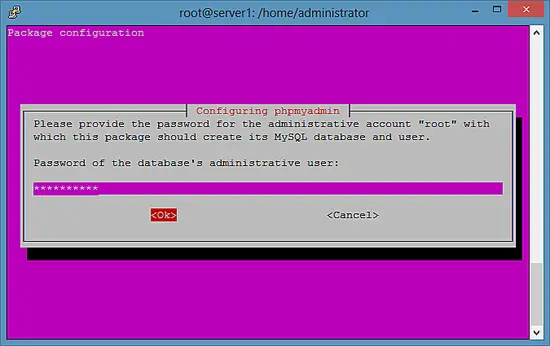
Password of the database's administrative user: <-- Enter the MariaDB root password
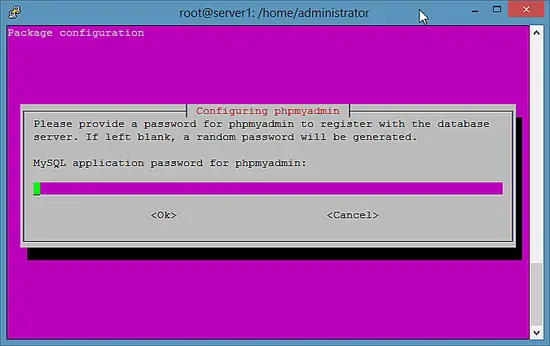
MySQL application password for phpmyadmin: <-- Press enter, apt will create a random password automatically.
Web server to reconfigure automatically: <-- apache2
Here the answer sequence as screenshots:Configure database for phpmyadmin with dbconfig-common? <-- Yes
Password of the database's administrative user: <-- Enter the MariaDB root password
MySQL application password for phpmyadmin: <-- Press enter, apt will create a random password automatically.
Web server to reconfigure automatically: <-- apache2
MariaDB enables a plugin called "unix_socket" for the root user by default, this plugin prevents that the root user can login to PHPMyAdmin and that TCP connections to MySQL are working for the root user. Therefore I'll deactivate that plugin with the following command:
echo "update user set plugin='' where User='root'; flush privileges;" | mysql --defaults-file=/etc/mysql/debian.cnf mysql
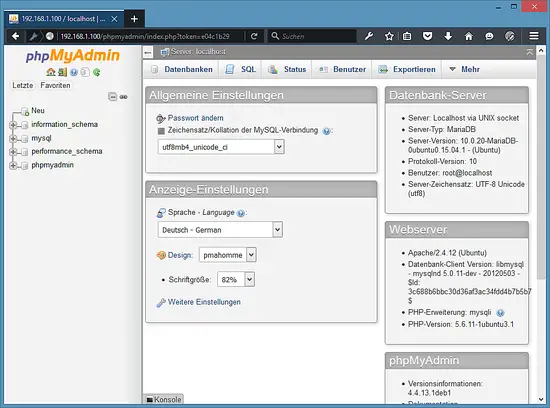
Afterward, you can access phpMyAdmin under http://192.168.1.100/phpmyadmin/: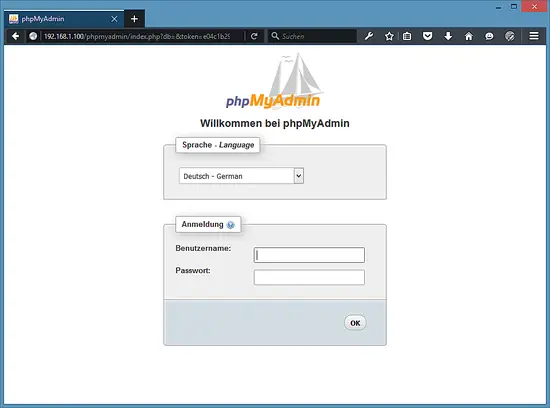
Komentar
Posting Komentar